

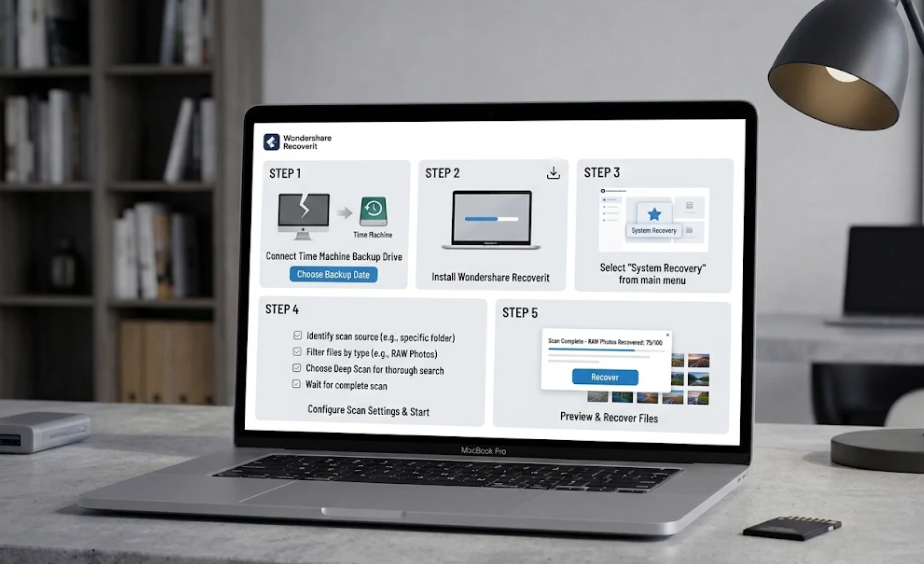
A Mac system crash – a kernel panic, a failed update, a hard shutdown – can leave your files feeling out of reach. If the Mac restarts and your files are gone, or if it will not start at all, the instinct is to panic. The right response is to work through the recovery options in order.
Here is how to recover files after a Mac system crash, whether the Mac boots or not.
First: Check If the Mac Still Boots
The recovery path depends on one question: does your Mac start?
- Mac boots normally → check the Trash, Time Machine, and run a scan (methods below).
- Mac boots to a blank or error screen → use a recovery tool with bootable media (final method).
- Mac will not boot at all → skip to the bootable media section.
Method 1 – Check Trash and Time Machine
If the crash left you logged out or the files “disappeared,” start with the built-in options:
1. Open the Trash and look for your files. If they are there, use Put Back.
2. Connect your Time Machine drive and restore the files from a backup taken before the crash.
Time Machine is especially useful after a crash – it restores the state of your files from before the problem, not the corrupted state left behind.
Method 2 – Scan the Drive with Recovery Software
If the crash did not physically damage the drive, the files are likely still on it – the crash may have corrupted the file system index, not the data.
Wondershare Recoverit scans Mac drives and recovers files after crashes, including on Apple silicon Macs. The same engine behind the Recoverit platform is trusted by more than five million users for disaster recovery.
- Launch Recoverit and select the drive that was affected.
2. Click Scan. The all-around scan looks for files the crash left unreferenced; follow with a deep scan if needed.
3. Preview the files and click Recover, saving them to a different drive.
Method 3 – Recover from a Mac That Will Not Boot
When the Mac will not start, you cannot run recovery software on it normally. The solution is bootable media: create a bootable USB drive on another Mac, boot the crashed Mac from it, and recover your files.
Step 1 – Create a Bootable USB Drive
On a working Mac, open Recoverit and use the crash recovery tool to create a bootable USB drive. You will need a USB drive with enough space (8GB or more).
Step 2 – Boot the Crashed Mac from the USB
Connect the USB drive to the crashed Mac, restart it, and hold the Option key during startup. Select the USB drive from the startup menu to boot from it.
Step 3 – Scan and Recover Your Files
Once the Mac boots from the USB, Recoverit starts automatically. Select the internal drive, scan it, and recover your files to an external drive.
This is the method that recovers data from Macs that will not start – the files are still on the drive; the system is what failed.
What If the Drive Is Physically Damaged?
If the crash involved a physically damaged drive – clicking sounds, no power, repeated disconnects – stop attempting DIY recovery. Every read attempt risks further damage. Consult a professional data recovery service with clean-room equipment.
Preventing Crash-Related Loss
- Enable Time Machine. A backup from before the crash is the fastest recovery there is.
- Keep your Mac updated. Many “crashes” are update-related; staying current reduces them.
- Don’t ignore warning signs. Frequent crashes or drive errors mean back up now.
- Keep a spare external drive. You need somewhere to save recovered files.
Conclusion
A Mac system crash is scary, but your files are usually still on the drive – the system failed, not the data. Check the Trash and Time Machine, scan the drive with recovery software, and use bootable media if the Mac will not start. With Wondershare Recoverit, you can recover files after a Mac crash whether the Mac boots or not. The crash was the system’s failure – your data does not have to be.
