

Photo recovery can save more than a picture. For a creator, one missing folder may contain the product shots for tomorrow’s post, the original images behind a carousel, or client photographs that nobody wants to shoot again. When those files disappear, the immediate priority is to protect the originals, not keep exporting new content onto the same storage.
There may already be another copy in a camera card, cloud library, editing app, or collaborator’s computer. If those checks fail, Drecov can help Windows users search stable local storage for deleted or lost images and recover selected results elsewhere.
Find the Image You Need
A social post often has several versions of the same photograph. There is the camera original, an edited master, a resized export, and the image a platform displays after upload. Before scanning anything, decide which layer has gone missing.
If you still have the original and your editing settings, you may be able to recreate an export. If only the uploaded picture survives, it may help with a temporary post but lack the detail needed for a website banner or print. Check its actual dimensions instead of assuming that a familiar-looking picture is the full-resolution version.
List a few identifying details: approximate shoot date, camera filename pattern, expected format, subject, and last storage folder. That small amount of preparation makes a large recovery results list much easier to review. It also prevents the disappointment of restoring an old edit when you really needed the untouched source.
Look Beyond the Gallery
Check the camera card before recording anything else onto it. The source photographs may still exist even if a transfer to the PC went wrong. Then inspect your photo editor’s catalog, export folders, cloud trash, version history, and any drive used for client delivery.
Ask collaborators about the files they received. A designer may have the approved image, while a photographer retains the original. Email attachments and shared download folders can supply a usable copy without touching the affected storage. Check permission and ownership before recovering or redistributing client material.
For photographs deleted from a Windows folder, inspect the Recycle Bin. If it has already been emptied, Recycle Bin recovery explains another route to investigate.
Preview the Possibilities
Drecov supports Windows recovery attempts across local and connected storage, including hard drives, SSDs, USB drives, and memory cards. For creators, its filtering and preview tools help separate potentially useful images from unrelated files and duplicate exports.
The photo recovery provides quick and deep scan options, read-only scanning, and pause and resume controls for longer searches.
A preview is a useful first check. Look for the correct subject and a complete image, then inspect the recovered file at full size later. A thumbnail can look healthy even when the underlying image is incomplete. Keep expectations tied to what the actual file shows, not just the number of results found.
Bring Photos Back with Drecov
Install Drecov on healthy storage rather than the affected source. Connect a separate destination drive with enough space for the images you hope to retrieve. For a memory card, use a reliable reader and do not open the card in an application that might write to it.
Step 1 Locate the Originals
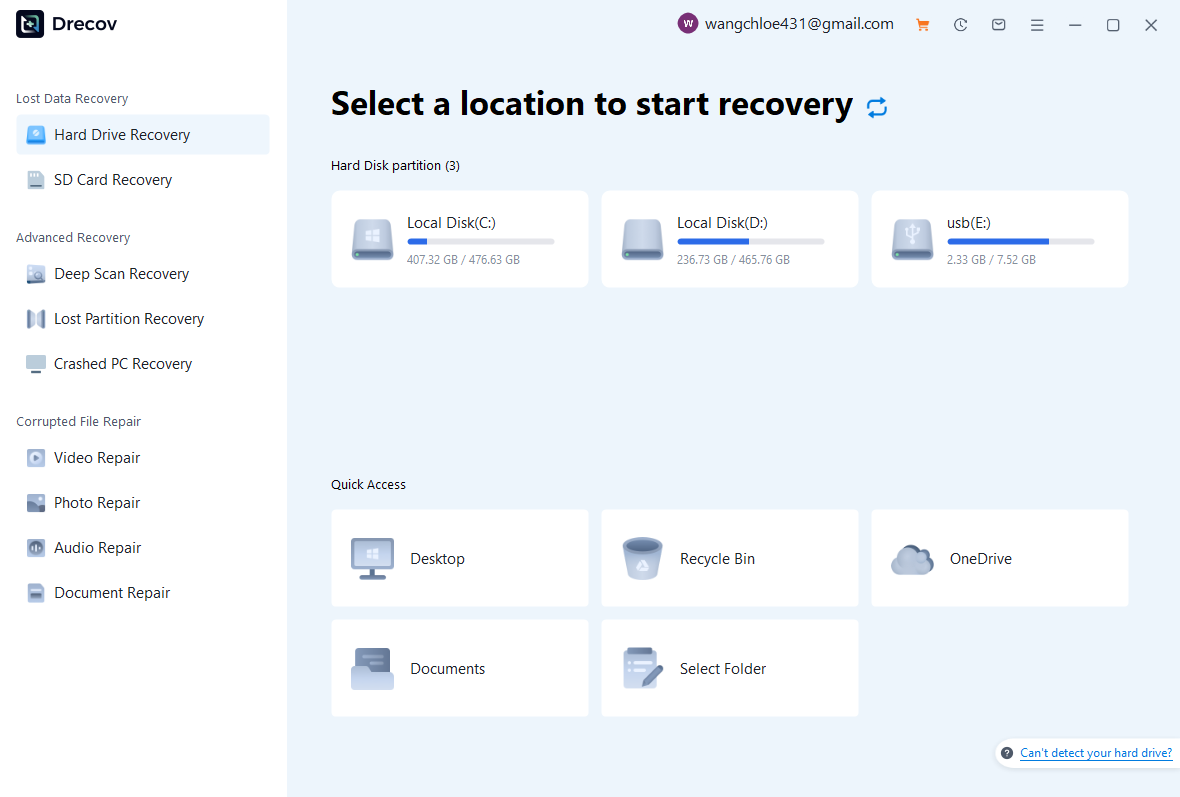
Choose the drive or folder where the missing photographs last lived. If they disappeared from a Windows desktop folder, select Desktop or the appropriate folder. If they lived on a card or external drive, select that connected device instead. Confirm its capacity and identity; the right source matters more than the eventual save location.
Step 2 Scan the Source
Start the scan and allow Drecov to search for recoverable content. If the initial search misses the pictures, use Deep Scan Recovery for a broader search. Do not take new photographs or transfer other files onto the device during scanning. A large card can take time, so avoid repeatedly unplugging it or restarting the process.
Step 3 Review the Pictures
Open File Type and choose Pictures, or browse File Location if the original folders remain available. Use Search and Filter to narrow the results. Preview supported images, look for the intended shoot, and select the photographs you need. If names have disappeared, the subject and visible content may be better clues than the recovered filename.
Step 4 Restore and Inspect
Click Recover and choose a different healthy drive. Do not save onto the card or source drive you scanned. Open the recovered folder after completion, view key pictures at full size, and confirm that they are suitable for the intended use. Keep the source untouched until you have checked the results and made another copy.
Rebuild the Post Carefully
Recovered images may not arrive in their original folder structure, so review before importing everything into an editor. Group verified pictures by shoot or campaign, then compare dimensions, orientation, and visible details. Preserve the recovered originals and edit copies instead.
For client work, confirm that the restored image matches the approved version. A nearly identical earlier edit can carry the wrong crop, colour treatment, or product detail. If the picture depends on a sidecar file or catalog setting, check whether that companion material survived too. Recovering the image alone may not restore its editing history.
Some projects mix stills and clips. If a campaign also lost local footage, the video recovery topic covers that related need. A surviving video frame can sometimes help with an emergency placeholder, but it should not replace a proper photograph when resolution or client approval matters.
Protect the Shoot First
Stop taking pictures on the affected memory card. Do not keep editing or downloading onto the drive that held the missing images. New writes can reuse deleted storage space, reducing what a recovery tool can find.
Cancel prompts to format an unreadable card. Avoid repair commands, formatting, or initialization before recovering the data. If the device disconnects repeatedly, becomes unusually hot, or freezes the computer, stop the DIY attempt and consider a professional recovery service. Software is not a repair for broken electronics or severe physical damage.
If the source is an internal SSD, recovery may be limited by TRIM and background activity even after a recent deletion. No software can guarantee restoration. Keeping the source unchanged is still worthwhile because it avoids preventable overwriting while you assess the available options.
Keep a Creator Archive
Build a simple archive before clearing a card. Copy originals to the working drive, open a sample, and make a second copy on separate storage. Keep a cloud or off-site backup for important shoots. Only reuse the card once you have verified those copies.
Separate originals, working edits, and platform exports. This makes it easier to rebuild a missing post without disturbing the source photographs. Include shoot dates and meaningful project names, and keep version history for images that pass through several approvals.
Photo recovery is a useful fallback, not an archive plan. When pictures go missing, first check the copies that may already exist. If none is usable, protect the storage and let Drecov help you search and preview recoverable images. Once the right files return, back them up before reopening the content calendar. A few minutes spent protecting the recovered originals can prevent the same interruption next week.
