

You’ve hiked two miles to catch a golden-hour sunset over a mountain lake, only to realize your handheld shots are plagued by camera shake. Or maybe you’ve tried balancing your camera on a rock, praying it doesn’t topple into the dirt. Every travel photographer has been there — that moment when the perfect scene demands steady support, and you simply don’t have it. A lightweight tripod for travel photography solves this frustration without weighing down your pack or slowing your pace. The real challenge, though, isn’t deciding whether you need one — it’s choosing the right one. With hundreds of options flooding the market, finding a tripod that genuinely balances portability with rock-solid stability can feel overwhelming. Too light, and it wobbles in a breeze. Too heavy, and it stays in the hotel room. This guide cuts through the noise. We’ll explore why lightweight tripods matter for travel, break down the features that separate great options from mediocre ones, help you match a tripod to your specific shooting style, and walk you through a practical selection process. Whether you’re a landscape enthusiast chasing long exposures or a street photographer who values speed and discretion, the right photography support gear is closer than you think.
Why a Lightweight Tripod is Essential for Travel Photography
Travel photography demands constant movement — hopping between locations, navigating crowded streets, climbing trails, and squeezing into tight transport. Every ounce in your bag matters when you’re covering miles on foot, and a bulky traditional tripod quickly becomes the first piece of gear left behind. That’s exactly why lightweight tripods have become indispensable for photographers on the move. Shaving even a pound off your kit reduces shoulder fatigue and frees up pack space for extra lenses or personal essentials.
Beyond comfort, travel tripods offer genuine versatility that handheld shooting simply can’t match. Consider capturing a silky waterfall in a shaded canyon, where shutter speeds drop below 1/15th of a second — no amount of steady hands will produce a sharp frame. Or picture yourself shooting a bustling night market where you want both ambient glow and crisp detail. Lightweight tripods make these shots possible without anchoring you to one spot. They set up quickly on cobblestone plazas, sandy beaches, and rocky overlooks alike. The best models fold compact enough to strap onto a daypack yet extend tall enough for comfortable eye-level composition. When your photography support gear travels as easily as you do, you stop making compromises and start capturing the images you actually envisioned.
Key Features to Look for in a Portable Tripod
Not all lightweight tripods are created equal, and understanding the core features that separate a reliable travel companion from a frustrating one saves you money and missed shots. Material choice sits at the top of the priority list. Carbon fiber tripods typically weigh 20-30% less than their aluminum counterparts while offering superior vibration dampening. Aluminum remains a solid budget-friendly option, but you’ll feel the difference after a full day of hiking. Next, check the maximum load capacity — your tripod should comfortably support at least 1.5 times the weight of your heaviest camera-and-lens combination. Anything less risks instability, especially in wind or on uneven ground.
Folded length determines whether your portable tripod fits inside or alongside your travel bag. Models that collapse to 16 inches or less typically slide into carry-on luggage without issue. Leg lock mechanisms also deserve attention: twist locks offer a sleeker profile and fewer snag points, while flip locks allow faster deployment and easier field maintenance. Finally, consider the number of leg sections — more sections mean a shorter folded length but can slightly reduce overall rigidity. The sweet spot for most travelers is four or five sections, balancing packability with solid performance.
Stability vs. Weight: Finding the Balance
The eternal trade-off in photography support gear comes down to this: shave too much weight and your tripod becomes a liability in anything beyond calm conditions. Leg tube diameter is your most reliable indicator of sturdiness — tubes measuring 25mm or wider at the top section generally handle mirrorless and mid-size DSLR setups without flexing. Thinner legs save grams but transmit more vibration, particularly when fully extended. The tripod head matters equally. A ball head with a separate panning base gives you fluid control for composition adjustments, while a lighter head with fewer locking knobs reduces overall weight but may limit precision. Test stability by mentally matching your shooting scenarios to the tripod’s specs: if you frequently shoot in coastal wind or use telephoto lenses, prioritize leg diameter and a hook for hanging your bag as ballast over saving an extra few ounces.
How to Choose Based on Your Shooting Style
Your ideal lightweight travel tripod depends less on brand loyalty and more on how you actually shoot. A photographer who spends hours waiting for dawn light over a valley has fundamentally different needs than someone darting through Tokyo’s backstreets capturing candid moments. Matching your tripod to your shooting style ensures you’re not hauling features you’ll never use — or worse, missing features you desperately need when the moment arrives.
Landscape Photography: Stability for Long Exposures
Landscape work punishes weak tripods. You’re often shooting at narrow apertures with slow shutter speeds, sometimes several seconds or longer for silky water or cloud movement. In these situations, even minor vibrations ruin a frame. Look for a tripod with a center column that can be removed or inverted, allowing you to position your camera just inches above ground level for dramatic foreground compositions. A ball head with an Arca-Swiss compatible clamp gives you precise framing control, and spiked feet — either built in or as swappable accessories — anchor your setup on soft ground or slippery rock. Leg sections with independent angle adjustments let you level the platform on uneven ridgelines without relying on the center column, which introduces wobble when extended. If you regularly stack filters for long exposures, factor that added front-element weight into your load capacity requirements, since a heavy lens plus filter holder shifts the center of gravity forward and stresses the head’s locking mechanism.
Travel and Street Photography: Speed and Discretion
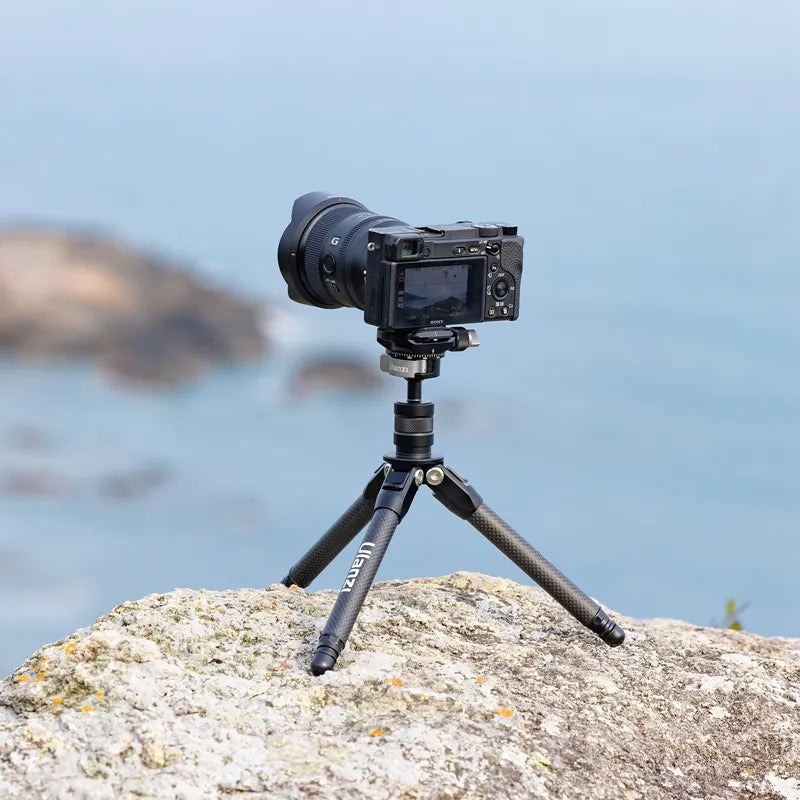
Street and general travel photography reward tripods that disappear until you need them. A compact portable tripod weighing under three pounds and folding to around 14 inches tucks neatly into a messenger bag or clips to the outside of a small backpack. Quick-deploy flip locks let you go from folded to shooting height in under ten seconds — critical when a fleeting scene demands a stable platform for a bracketed exposure or a self-timer group shot. Tabletop mini tripods also deserve consideration here — brands like Ulanzi offer pocket-friendly options that work beautifully on café tables, ledges, and railings for nighttime cityscapes. For street shooters who value stealth, a slim tripod with matte black or dark gray finish draws far less attention than a tall, shiny rig. Prioritize lightweight heads with a single locking knob for fast angle changes, and skip features like gear-driven columns that add bulk without serving your fast-paced workflow.
Step-by-Step Guide to Selecting Your Lightweight Travel Tripod
Choosing the right lightweight travel tripod doesn’t require guesswork if you follow a structured approach. Start by assessing your gear weight and shooting frequency. Weigh your heaviest camera-and-lens combination, then add any accessories like battery grips or filter holders. This total determines your minimum load capacity requirement — remember the 1.5x safety margin mentioned earlier. Also consider how often you’ll actually deploy the tripod. Daily use on a two-week trek demands different durability than occasional weekend outings.
Next, set a realistic budget and rank features by importance. If you shoot primarily in windy coastal environments, allocate more toward a sturdy carbon fiber build rather than spending on a fancy head you can upgrade later. Conversely, if packability is your top concern for airline travel, prioritize folded length and weight over maximum load capacity you may never need. Write down your top three non-negotiable features before browsing — this prevents impulse decisions driven by marketing.
With your priorities clear, research and compare models methodically. Read hands-on reviews from photographers whose shooting style mirrors yours, and search specifically for real-world feedback on photography support gear rather than relying solely on spec sheets. Pay attention to complaints about leg lock reliability, head smoothness, and long-term durability — these issues rarely surface in manufacturer descriptions. When possible, visit a camera store to physically handle your shortlisted tripods. Extend the legs fully, mount your camera if the store allows it, and simulate your typical shooting positions. Check whether the controls feel intuitive under gloves if you shoot in cold climates. Finally, create a simple comparison checklist covering weight, folded length, load capacity, leg diameter, lock type, and head compatibility. Scoring each model against your personal priorities turns an overwhelming decision into a clear, confident choice.
Top Recommendations and Maintenance Tips
When exploring portable tripods in the current market, a few categories stand out. Ultra-compact carbon fiber models weighing around two pounds work exceptionally well for backpackers who need minimal bulk — their main trade-off is a lower maximum height that may not suit taller photographers. Mid-range aluminum travel tripods in the three-pound class offer excellent value, providing solid stability for mirrorless systems while keeping costs reasonable, though they fatigue shoulders faster on long hikes. Full-featured carbon fiber options near 3.5 pounds deliver professional-grade stability with generous load capacities, but their larger folded dimensions may not fit inside smaller carry-on bags.
For common field challenges, a few practical solutions go a long way. In windy conditions, hang your camera bag from the center column hook to add ballast, and spread the legs wider for a lower center of gravity. On uneven terrain, use independent leg angle settings rather than extending the center column, which amplifies vibration. Sandy or muddy environments call for rubber foot covers to prevent grit from entering leg locks. After shooting near saltwater, wipe down all joints with a damp cloth and dry thoroughly to prevent corrosion. Every few months, disassemble twist locks and clean accumulated dust or sand from the threading — this single maintenance habit prevents the most common tripod failure. Store your portable tripod with legs slightly loosened rather than fully clamped to reduce long-term stress on lock mechanisms, and keep it in a breathable bag rather than sealed plastic to avoid moisture buildup that degrades rubber grips over time.
Invest in Stability and Elevate Your Travel Photography
The difference between a good travel photo and a stunning one often comes down to stability at the decisive moment. Throughout this guide, we’ve seen that selecting the right lightweight travel tripod means balancing weight against sturdiness, matching features to your specific shooting style, and following a deliberate selection process rather than grabbing whatever looks appealing online. Landscape photographers need rock-solid platforms that handle long exposures and harsh terrain, while street and travel shooters benefit from compact, fast-deploying setups that stay out of the way until needed. Whatever your style, the fundamentals remain the same: know your gear weight, prioritize the features that serve your real-world shooting conditions, and invest in quality materials that hold up over years of use. The right portable tripod doesn’t just prevent blurry images — it expands what you can capture entirely, opening doors to creative techniques that handheld shooting simply cannot achieve. Take the checklist approach outlined here, handle a few models in person if possible, and commit to the tripod that fits your adventures. Your next trip deserves images as sharp and compelling as the moments that inspired them.